Shabby Chic Black Brush Stroke Splashes: What Designers Wish You Knew Before Using Grunge Overlays
You have seen the look everywhere. Posters with edgy black splashes. Fliers that combine soft backgrounds with bold, painterly marks. Social media graphics that feel both vintage and raw. That aesthetic often comes from a single versatile resource: Shabby Chic Black Brush Stroke Splashes. These transparent PNG files act as overlays, adding instant texture and attitude to any project. But here is the truth that experienced designers understand and beginners often miss. Using these elements effectively demands more than just dragging and dropping. It requires thought, restraint, and a clear understanding of what you are working with.
The Real Value of a Grunge Black Brush Pattern
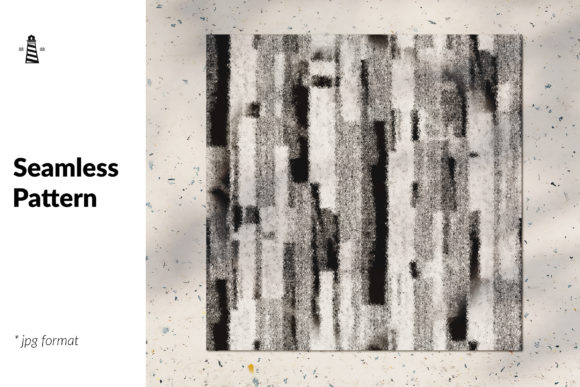
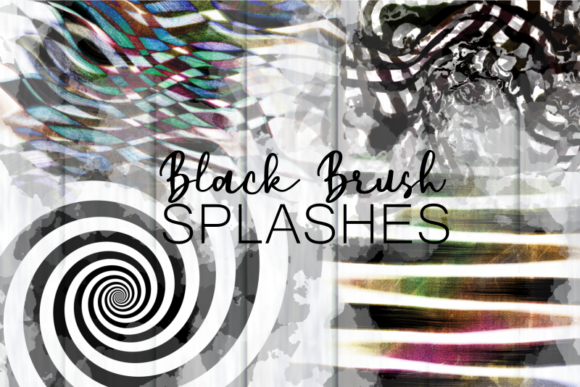
Shabby Chic Black Brush Stroke Splashes are not just random ink blots. They are deliberately designed digital assets that replicate the uneven, tactile quality of real brushwork. The collection includes polka dots, stripes, abstract marks, and grunge textures. Each file comes as a transparent PNG at 300 dpi, with dimensions of 12 inches or 3600 pixels. That resolution matters. It gives you the freedom to scale, rotate, and layer without losing sharpness or introducing unwanted pixelation. What you are buying is flexibility. But flexibility only helps if you know how to use it.
Many people purchase these overlays expecting instant perfection. They drop a splash onto a solid background and call it finished. That approach works for a quick project, but it rarely produces the polished, intentional look that separates amateur work from professional design. The difference comes down to understanding how brush stroke elements interact with colour, composition, and audience perception.
Mistake One: Using Overlays Without Considering Background Contrast
The most frequent error is placing a black brush stroke splash on a background that is too dark, too busy, or the wrong shade. Transparent PNGs rely on contrast. If your background colour absorbs the black marks, the subtle grunge details disappear. The result looks muddy instead of striking. Conversely, a very light background can make the brush strokes feel harsh if the contrast is too high without any softening.
Better approach: Test your overlay on at least three different background colours before finalising. Pastels, muted earth tones, and clean whites tend to work well. If you need to use a darker background, consider reducing the opacity of the brush splash. A black mark at 70 or 80 percent opacity still reads as black but sits more gently on the page. This simple adjustment preserves the grunge feel while keeping the overall composition balanced.
Mistake Two: Overloading the Design with Too Many Splashes
Grunge patterns are exciting. When you have twenty distinct designs at your disposal, the temptation is to use as many as possible. The result is visual noise. Your audience cannot focus on the message because the decorative elements compete for attention. Posters become chaotic. Fliers lose hierarchy. The brush strokes that should enhance your design end up burying it.
Better approach: Choose one or two complementary splash patterns and build your layout around them. For instance, use a stripe brush pattern as a subtle background accent and a single bold splash near the headline. This creates a clear focal point. Your eyes know where to look. The shabby chic aesthetic relies on a sense of imperfection, not chaos. Restraint is your ally.
Mistake Three: Ignoring File Resolution and Scaling
Because Shabby Chic Black Brush Stroke Splashes come at 3600 pixels wide, you can scale them down without issue. But scaling up is a different story. If you try to stretch a 12-inch splash to cover a 24-inch poster, you will lose sharpness. The edges become soft. The grunge effect that should look deliberate starts to look accidental and messy.
Better approach: Always work at the native resolution or smaller. If you need a larger area, combine multiple overlays instead of stretching one. Use the composition tools in your editing software to arrange several splashes into a unified pattern. This maintains the crisp, high-quality look that makes brush stroke designs feel intentional rather than sloppy.
Surprising Details That Affect Your Final Results
Beyond the obvious mistakes, there are nuances that even experienced users sometimes overlook. One of them is the relationship between brush stroke overlays and text. A common scenario involves placing a splash behind a headline. The idea is to make the text pop. But if the brush marks are too dense or too dark in the exact area where the text sits, readability suffers. Your audience struggles to read the words. The design fails at its primary job.
The solution is simple. Position the splash to the side, or adjust the placement so the darkest marks avoid your text. Another technique is to use a soft eraser or mask to fade the overlay in the area where text appears. This keeps the grunge aesthetic intact without sacrificing legibility. Remember, decoration serves the content, not the other way around.
Another overlooked detail involves matching brush stroke splashes with other design elements. The shabby chic and grunge style pairs naturally with serif fonts, handwritten typefaces, and distressed textures. It clashes with ultra-modern, clean sans-serif fonts and glossy finishes. If your poster uses a sleek corporate font alongside a grunge black brush pattern, the viewer feels a mismatch. The design lacks cohesion. Always consider the overall mood you want to convey and choose fonts, colours, and imagery that align with the raw, handcrafted feel of the brush strokes.
What to Check Before You Buy or Download Shabby Chic Black Brush Stroke Splashes
If you are considering purchasing these overlays, or if you already have a set and want to use it correctly, take a moment to verify a few things. First, confirm that the files are indeed transparent PNGs. Some sellers offer JPEG versions with white backgrounds, which defeats the purpose of an overlay. The listing you referenced clearly states transparent PNG, which is exactly what you need.
Second, check the resolution and dimensions. The 300 dpi and 3600 pixel width guarantee professional-grade output for print projects. If you are working only for digital screens, you can downsample without worry, but having high-resolution originals gives you flexibility for future print needs.
Third, examine the variety of patterns. A good set includes multiple moods. In this case, you get polka dots, stripes, abstract shapes, and grunge textures. That variety allows you to mix and match across different projects. A single splash style becomes predictable. A collection of different patterns keeps your work fresh and adaptable.
Finally, look for matching papers. The product description mentions that matching papers are available in the store. This is a valuable detail. Using brush stroke overlays that coordinate with background papers ensures harmony in your design. The splashes and the paper share the same texture language, making your layout feel unified and professionally crafted.
Practical Advice for Getting the Most Out of Your Overlays
Start with a clear purpose. Ask yourself what you want the brush stroke to communicate. Is it edginess? Vintage charm? Artistic spontaneity? The answer guides your choice of pattern. A polka dot splash reads differently from an abstract grunge mark. Each carries its own emotional weight. Use that awareness intentionally.
Experiment with blending modes. If you are using software like Photoshop or Canva, try settings like Multiply, Overlay, or Soft Light to change how the black brush interacts with the background. Multiply works well for deepening the grunge effect on light backgrounds. Soft Light creates a subtler impression. Do not settle for the default Normal mode without testing alternatives.
Layer your splashes. Use one large splash as the anchor and a smaller overlay for texture in another corner. Adjust opacity independently for each layer. This creates depth. The design feels less flat and more like a physical piece of art rather than a simple digital file.
Consider using the brush stroke elements as masks or clipping masks. You can apply a splash shape to a photo or a solid colour block, turning the brush stroke into a shape container. This technique is especially effective for modern poster layouts where images adopt irregular, painterly edges.
How These Mistakes Affect Your Bottom Line
For small business owners, bloggers, and marketers, these details directly impact how your audience perceives your brand. A poorly executed overlay makes your materials look rushed. Customers associate sloppy design with sloppy service. On the flip side, a well-integrated shabby chic brush stroke splash signals that you care about quality. It suggests creativity and attention to detail. The same $20 set of overlays can produce either outcome. The difference is in how you use the tools.
Freelancers and educators designing classroom materials, event posters, or social media graphics stand to gain the most from learning these techniques. You do not need to be a graphic designer. You just need to avoid the common pitfalls and apply a few straightforward principles. The result will be work that stands out, communicates clearly, and earns the reaction you want from your audience.
Final Thoughts Before You Start Designing
Shabby Chic Black Brush Stroke Splashes offer a quick path to a distinctive, handcrafted look. But like any creative resource, they work best when used with intention. Check your contrast. Limit your layers. Respect your resolution. Match the style to your message. Those small decisions transform a generic overlay into a custom design element that feels like it belongs exactly where you placed it.
The next time you open a project and reach for that black brush splash, pause for a moment. Look at the background. Look at the text. Look at the other elements on the page. Ask yourself if the splash is adding clarity or clutter. If it is the former, you are on the right track. If it is the latter, adjust. The beauty of transparent PNG files is that they forgive experimentation. You can always delete, move, or change opacity. Use that freedom wisely, and your designs will speak for themselves.